FILEMONKEY

Copyright MonkeyJob Systems 2005
All rights reserved

Home FAQ Forums Contact
Download
Tutorials FAQ Awards Report Bugs
 Search For Data
   
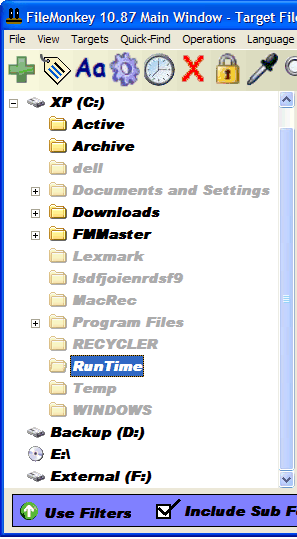
FileMonkey can copy, move, split, search, replace, rename, alter case, list or delete duplicate files, trim, truncate, crop, chop, set attributes, encypt, decrypt, wipe, delete, extract and more.

Green Arrow Download


Supported operating systems:
   Windows 98 and upwards

Size: 2.3 Megabytes


Green ArrowPurchase the latest full version.

Benefits of registering FileMonkey include:
  • No nagging
  • No trial period
  • 30 day money back guarantee (more info)
  • Free access to all updates
  • Email support
So please help support this product by purchasing the full version.
manage files


  Target Files Tutorial
  File Patterns Tutorial
  Main Tutorials Page
  Frequently Asked Questions
  Append
  Attributes
  Case
  Copy Or Move
  Command Line
  Dates
  Duplicates
  Encrypt
  Extract
  Find
  List
  Rename
  Search And Replace
  Split
  Join
  Wipe
  Truncate

Installation

1.

If you are installing over a previous install of FileMonkey then it is recommended that you close all open FileMonkey windows and un-install FileMonkey from your computer before installing again.

2.

Click HERE to download the FileMonkey installation package.

3.

Double click the file "FileMonk2.exe" (the file that you downloaded in step 2 above) and then follow the installation instructions.

If you have any installation problems, contact us


Uninstall

Close FileMonkey and then select the "Uninstall FileMonkey" shortcut in the FileMonkey folder of your start menu.

If this does not work then you can manually uninstall FileMonkey. First, close FileMonkey. Then, find the folder that FileMonkey is installed in (This is typically something like "C:\Program Files\FileMonk"). Delete this folder.


XML RSS Feed Update

Registered Users: Launch your registered version of FileMonkey. Select the "Help, Update" menu item. Alternatively, refer to your original order receipt for instructions or contact us.

Un-Registered Users: Click HERE to download the latest version.


Main Window

The main window is the main interface for FileMonkey. Click HERE for more information on the main window


Append To File Contents

To open this feature, select the "Quick-Find, Append" menu item from the main window.

The Append feature can append data (text) to the start or end of file contents. (Note: you can append text to file or folder names using the "Rename" feature).

Type the text that you wish to append in the append box. Choose if you want to append to the start or end of files.

Click "Start" to begin the operation. If you want to truncate file contents, use the "Trim" feature.


Edit Attributes

To open this feature, select the "Quick-Find, Attributes" menu item from the main window.

Click HERE for more information on "Editing attributes"


Changing Case

To open this feature, select the "Quick-Find, Case" menu item from the main window.

From here you can choose to change the case (capitalization) of file names or folder names in the current folder and/or all sub folders to match the case pattern of your choice from the choices provided. For example, you can change case of files between capital letters and lower case.


Copy Or Move Files

To open this feature, select the "Quick-Find, Copy" menu item from the main window.

From here you can either select to copy files or move files to a new location. You can optionally, copy or move files in sub-folders and re-create the original folder structure.

Click HERE for a tutorial.


Command Line (Batch Jobs)

To open this feature, select the "Quick-Find, Command Line" menu item from the main window.

Use this feature to create customized batch jobs. Batch jobs can make folders, rename or move files or perform many other batch command line jobs en-mass. Click HERE for more information on the "Command Line" feature.


Dates

To open this feature, select the "Quick-Find, Dates" menu item from the main window.

Click HERE for more information on the "Dates" feature


Duplicates

To open this feature, select the "Quick-Find, Duplicates" menu item from the main window.

Use this feature to search for duplicate files. Optionally, copy, move or delete duplicates.


Encryption

To open this feature, select the "Quick-Find, Encrypt" menu item from the main window.

Encrypting your files will make them unreadable until they are decrypted. This is useful if you don't want anyone else to view data on your computer. Only those who know the encryption password that you use will be able to decrypt the files.

Note that the encryption feature is NOT protected by FileMonkey's recycle bin protection so it is important that you do not forget the password that you use.

To encrypt all target files, enter a password (key) and click the start button. To decrypt these files, target them if they are not targeted (in the main window), enter the key you used to encrypt them and then click the start button again to decrypt them.

The FileMonkey Encryptor meets the 128 bit standard.

Key Text Box:

Use this box to enter a memorable key to encrypt or decrypt your files with. You must remember this key as you will need it to decrypt your encrypted files. (Note that this field is not saved on exit for security purposes). The key can be up to 255 characters long.

Start Button:

Click this button to encrypt or decrypt files.

Close Button:

Click this button to close the encrypt window and return to the main window.


Extracting Text

To open this feature, select the "Quick-Find, Extract" menu item from the main window.

Use FileMonkey to extract email addresses or other text from files. Click HERE for more information.


Finding Keywords

To open this feature, select the "Quick-Find, Find" menu item from the main window.

Use FileMonkey as a search engine for your computer. Click HERE for more information.


Listing File Names

To open this feature, select the "Quick-Find, List" menu item from the main window.

This facility will enable you to create and save a list of all target file names or folder names to a plain text file. From the "List" window, select your options and click on "Start" to generate the list.

Select "DOS Format" to list all files and folders in DOS format (for example: in DOS format, c:\my documents\mylargefile.txt is listed as c:\mydocu~1\mylarg~1.txt)

Select "Full Path" to list all files and folders with their full path (for example: instead of listing "myfile.txt", select this option to list "c:\myfile.txt").

You can choose to list all targets, read-only targets or targets with a positive archive flag. For example, when working on files, select the "Read Only Targets" option to list read-only files and ignore all others.

Select "Tab Delimited List" to convert your file list into a tab delimited list. This is useful if you want to import your files list into a spreadsheet program such as Microsoft Excel.

You can also add file dates and file sizes to your lists by checking the appropriate check boxes.

Note: FileMonkey now has basic print functionality. When the list has been compiled, click the "Print" button to print the basic full list (in the results window). If you wish to format your list before printing, click the "Save" button and save your file in plain-text format. Then open the file in your favorite text editor to format and print your list. Make sure you have plenty of printer ink.


Renaming Files

To open this feature, select the "Quick-Find, Rename" menu item from the main window.

Note that you can also use the "Replace" feature to search and replace on file names and the "Case" feature to change the capitalization of file names.

Click HERE for more information on renaming files


Search and Replace

To open this feature, select the "Quick-Find, Replace" menu item from the main window.

Search for something and replace it with something else. Click HERE for more information on search and replace


Split Files

To open this feature, select the "Quick-Find, Split" menu item from the main window.

Enter split size in the split size text box to define the size of split segments that you require. The options available from the drop down menu will enable you to select the unit of measurement. For example: enter 500 and select KB to define an individual segment size of 500KB.

Check the "Delete Original" check box if you wish to delete the original file after it has been successfully split.

Check the "Create Auto Re-Joiner" check box to create a bat file for each file that is split. Double clicking on this bat file will automatically join the split segments when you are ready to join them again. For example, this would be useful if you wanted to join files on another computer without installing FileMonkey.


Join Files

To open this feature, select the "Quick-Find, Join" menu item from the main window.

Check the "Delete Split Segments" check box to delete the segments after a successful join. If this is not checked then the segments will not be deleted.

Check the "Write Over Original" check box if you wish to write over the original file.

Select the "Join Files That Have Been Split Using FileMonkey" option to join files that have been split using FileMonkey.

Select the "Join Files That Have Been Split Using Third Party Software" option to join files that have been split using third party software. This join operation may not be successful in all cases because different software packages split files in different ways and so we cannot guarantee success using this method. In general, if the files are split with a sequential extension (1, 2, 3 ...) and they have not had any data added to them by the third party software then this method will work ok. To be on the safe side, we recommend that you test the joined file after the operation completes to make sure that it runs or loads correctly.

Select the "Merge Files In To One File" option to merge all main window target files into 1 big file. If you are including sub-folders then there will be 1 new file created in each sub-folder.

Click the "Start" button to start the operation that you have selected.

Click the "Close" button to close the window and return to the main window.


Wipe Files

To open this feature, select the "Quick-Find, Delete" menu item from the main window.

From here you may permanently wipe target files from your hard drive, delete target files from your hard drive or permanently wipe Free Space from your drive. The wipe functionality of FileMonkey complies with the US government dod (Destruction Of Data) standard.

Send Files To Recycle Bin:

Select this option to send target files to the recycle bin. These files may be recovered from the recycle bin. Note that these files will be deleted if your recycle bin is damaged, corrupt or disabled.

Delete Files Radio Button:

Select the "Delete Files" option to delete target files from your hard drive. Note that the files may still remain on your hard disk and may still be recoverable by specialized recovery programs.

Wipe Files Radio Button:

Select the "Wipe Files" option to permanently erase and then delete target files from your hard drive. Note that the files will not be recoverable using deleted file recovery programs although the file names may still exist in the FAT (File allocation table). That is: the contents of all wiped files will be permanently erased and cannot be recovered.

Wipe FreeSpace On Drive Radio Button:

Select this option to permanently wipe all FreeSpace on the selected drive. Note that any deleted files on this drive will not be recoverable after performing this operation.


Trim Files

To open this feature, select the "Quick-Find, Trim" menu item from the main window.

Use this feature to:
  • Crop file names
  • Truncate folder names
  • Remove lines from the start of files
  • Remove lines from the end of files


  | About Us | Privacy | Terms | Partners | Copyright ©2003 MonkeyJob Systems All Rights Reserved |