Using Search And Replace To Add File Name To Title Tag
This tutorial will demonstrate the search and replace feature to add the filename to the start of html title tags
1.
|
Target your files in the main window. Click HERE for a targeting tutorial.
|
2.
|
Select the "Quick-Find, Replace" menu item from the main window.
|
3.
|
The "Replace" window will now be open.
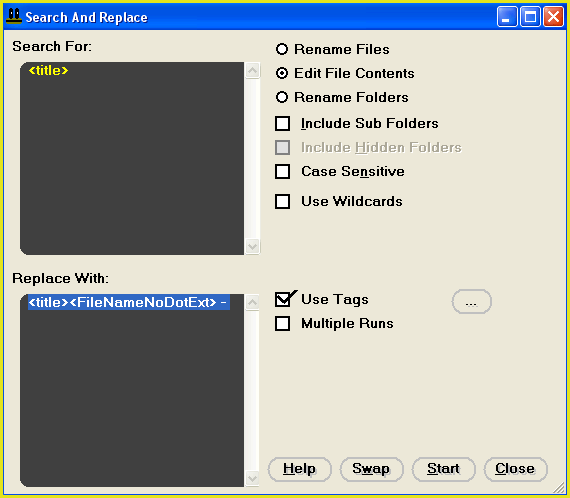
Fig 1

|
4.
|
Set up the window exactly as demonstrated in fig 1 above. Make sure that the "Use Tags" check box is checked.
You will note from the search and replace phrase that we intend to replace the title tag with the title tag, followed by the file name without dot extension (one of the FileMonkey in-built tags) and then followed by a space-hyphen-space.
To enter the file name tag, use the button on the right of the "Use Tags" check box.
If you want to extend the operation to work on files in sub-folders, check the "Include Sub-Folders" check box.
|
5.
|
Click on the "Start" button to start the operation.
|
6.
|
Note that there is no undo facility for this feature however, all operations are by default, protected by the recycle bin. Provided that your recycle bin is working properly, you will find the original, un-edited files there.
|
|
